chelsey
Last updated: 27 June 2025
Before you connect Sage Intacct to SaaSGrid, there are a few steps you will need to complete. This article will guide you through the prerequisites to set up an Sage Intacct Integration.
Subscribe to Web Services
Company > Subscriptions
Find ‘Web Services’ and click on it to Subscribe
Ignore the warning about additional charges

If you are enforcing IP address filters, add SaaSGrid’s IP Address to Sage Intacct’s allowed list.
Company > Company Info
Click EDIT
Click on the ‘Security’ tab
Go to the field labeled “Enforce IP address filters” and click the Edit icon
Add SaaSGrid’s IP address: 3.227.99.15

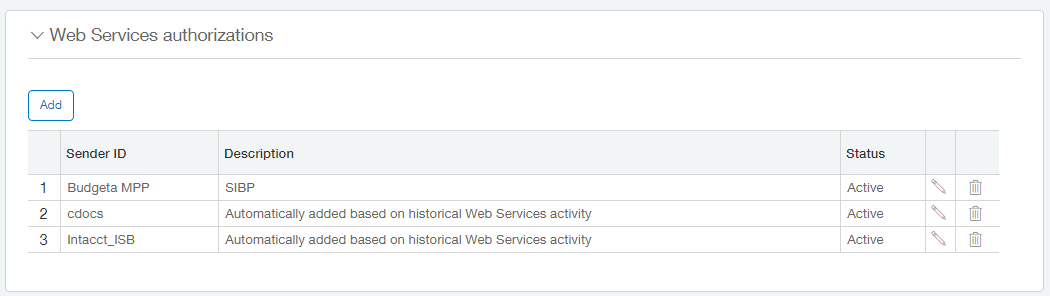
Add SaaSGrid’s Sender ID to the allowed list.
Company > Company Info
Click EDIT
Click on the ‘Security’ tab
Go to the section labeled “Web Services authorizations” and add the Sender ID: SaaSGridMPP
Instructions vary slightly depending on if your security is “Role-Based” or “User-Based”.
Create User with Role-Based Security
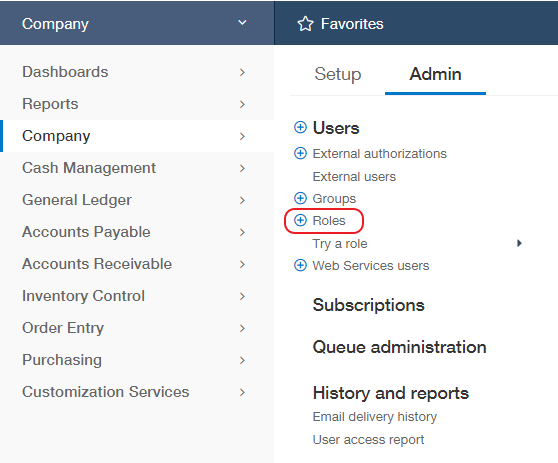
Create a Role
Navigate to Company > Roles and click ADD.
Input a name and click SAVE.
Check the box next to “General Ledger”
Click “Permissions” next to General Ledger
Press “Read-Only in the top right corner.
Click SAVE in the popup.
Click SAVE to create the role.
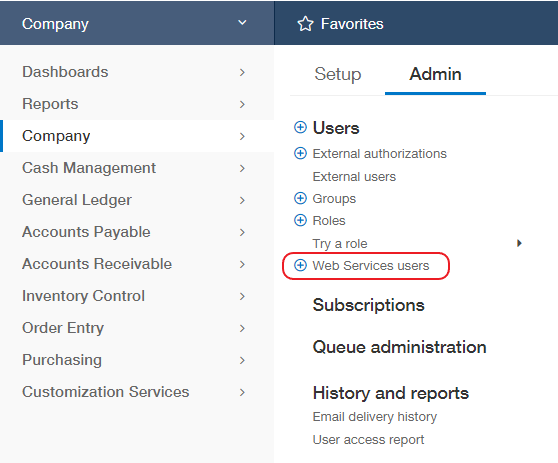
Create Web Service User
Navigate to Company > Web Service User and click NEW.
Input values for these fields:
User ID
Last name
First name
Email address
Make sure the User Type = Business User
Click on the ‘Roles information’ tab and select the Role created in the prior step.
Click SAVE. Ignore any warning that there will be a charge for creating the User
Create User with User-Based security
Create Web Service User
Navigate to Company > Web Service User and click NEW.
Input values for these fields:
User ID
Last name
First name
Email address
Make sure the User Type = Business User
Click on the ‘Roles information’ tab and select the Role created in the prior step.
Click SAVE.
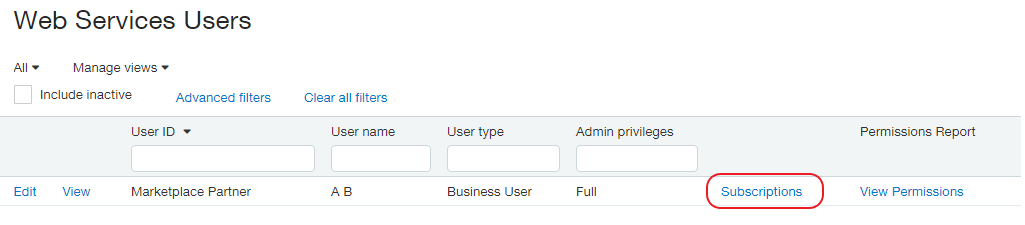
Add permissions to that new user
Navigate to the full list of Web Service Users in your Sage Intacct instance.
Find your Web Service User and click on SUBSCRIPTIONS.
Ensure the user has read-only permission for the General Ledger module.
Click SAVE.
Once you are logged into SaaSGrid, navigate to the Linked Accounts page. Click on the Link Account button under the Sage logo, which will bring up a popup:
Enter your login info and press Link.
Company ID: This can be found in Intacct under “Company > Company Info”
User ID: This is the ID of the webservice user you just created above
User Password: After you setup the webservice user, this password would have been emailed to you.
This will kick off a sync of your Intacct data. This can take a while, so SaaSGrid will email you when it’s complete.